Tuesday, March 30, 2010

Stylish Storage


Super Simple Stylish Storage Solution...

hee hee say that 10 times super fast... While adding some storage/closet/organization system to my entry way, all the colors started to wash out. Eh and that is so not my style. I picked up these photo boxes from Joanns, that I'm not going to use for photos...does anyone out there actually use them for photos? hmmm? I want them to be catch alls for crayons, other art supplies, Wii remotes and such...and the tan color they were here....


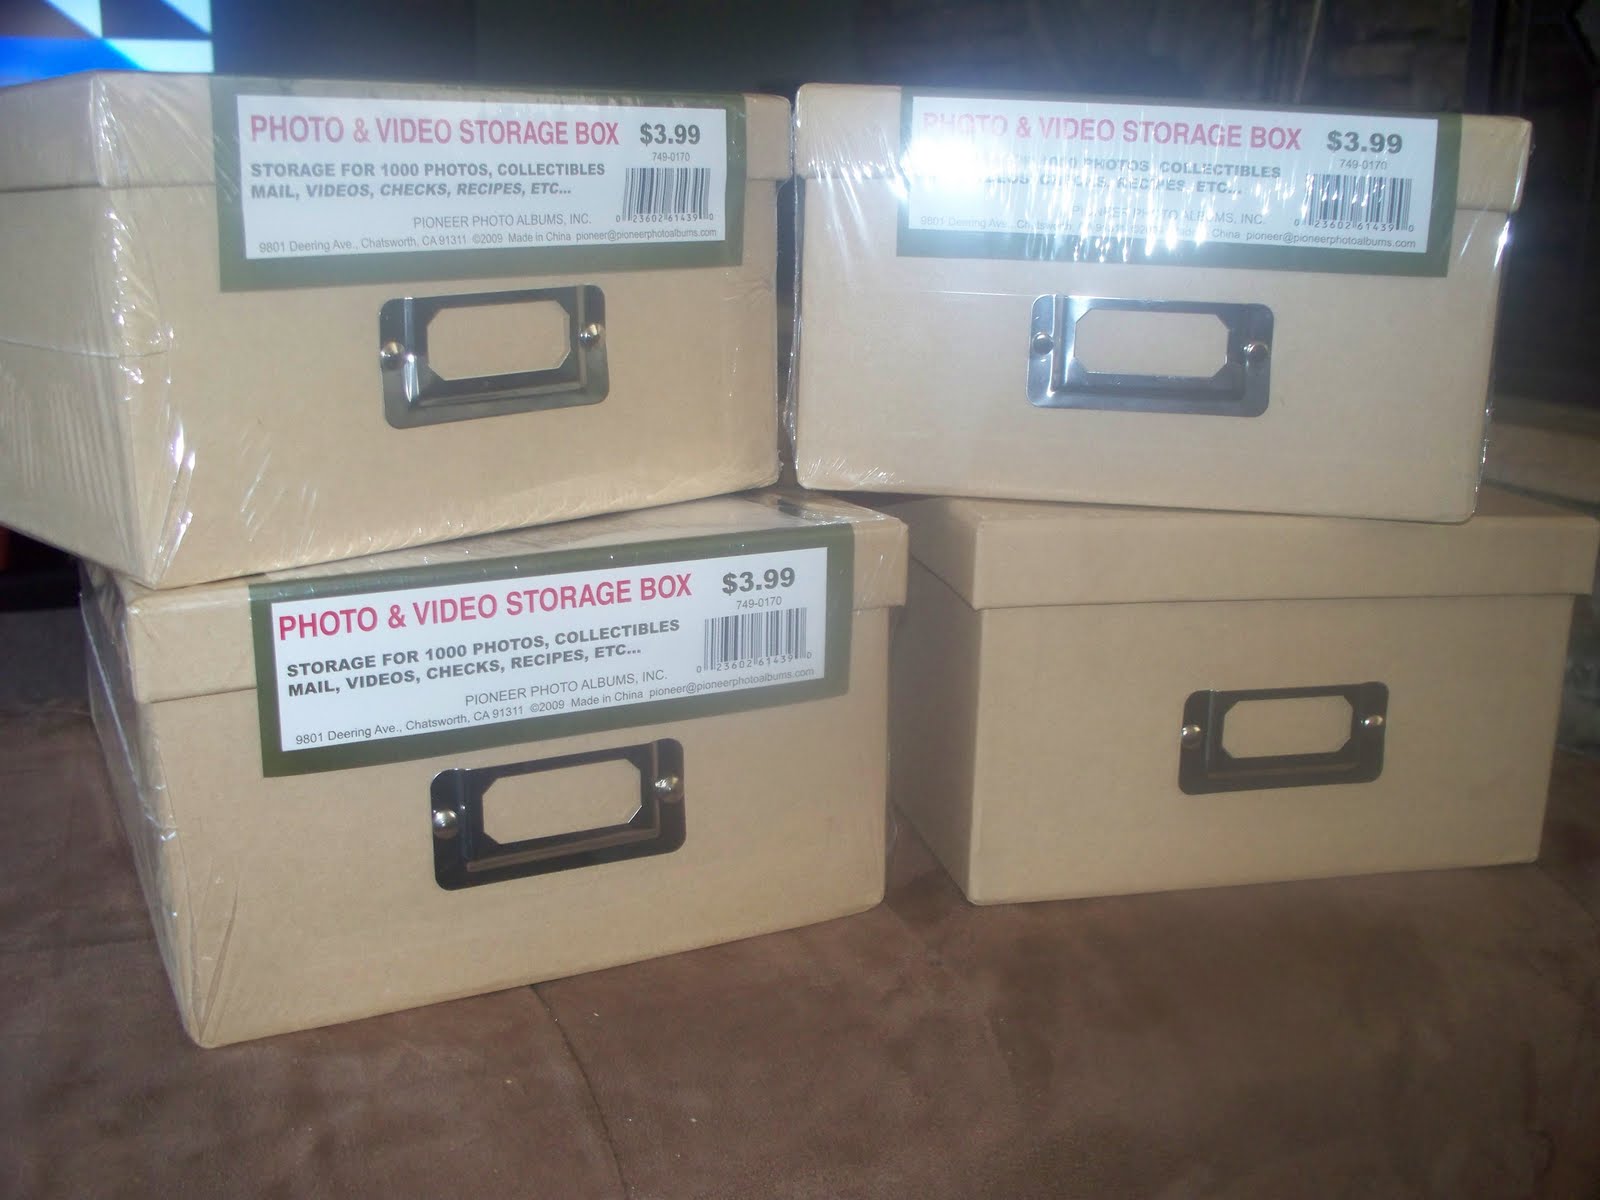
not cuttin it. My thoughts were to cover them with scrapbook paper? too time consuming. Cover them with fabric? will probably get dirty from all the little fingers runnin around (how would I wash em?) . Paint them! yep, thats what I did...so to get the texture of fabric. First I taped off the little maetal thingy the label goes in, and started with the paint, when I was painting them with a white primer so the color of paint I chose would actually show up, I used a brush with really coarse bristles, so the lines would show, therefor making a pattern like linen...ehhh...cool huh Back to the primer...you don't want to saturate the boxes, rememeber they are made out of cardboard, and will bubble up and all sorts of things when they get too wet. Here they are all primed...


Then I took some spray paint to them...it took about 2 coats for each box, to have the color I was aiming for. And here is how they turned out...


Then I just simply picked a cute font, and printed out some labels...and tada! A
Super Simple Stylish Storage Solution...ah ha ha love it!

Thursday, March 25, 2010

Spring Flower Wreath


I was a bit bored today...So I took an exciting trip over to Dollar Tree, and while I was walkin around, I decided to put together a Welcome Wreath for my front door, so I picked up a round wreath form some silk magnolia flowers and went home to create!
Here is my pile of stuff...

I first wrapped the wreath in some chocolate brown burlap I had. and then started to hot glue the flowers very strategically(just kidding very random) around the wreath.
Added a bow tied from the burlap, and this is what I came up with...


I am super happy with the fresh look of it! I just wish it really smelled like a fresh magnolia bush! Not realistic, I know, but a girl can dream.


Tuesday, March 23, 2010

A Set of Lamps- Made Over

Oh my...so some time ago, I picked up this lamp from the local Salvation Army...Its home for now is in my livingroom...so I painted the base a paprika color to accent all my decorations, but had no clue of what to do with the shade?


That was until, I got some great advice from Dayka @ Life + Stule: Meditations on Life and Style She suggested I go classic black with a white shade and some ribbon around it.... I was so gonna do it until yesturday, I found a match to that lamp at a yard sale for 1 dollar...mmhmmm! But it is in quite a fugly state, see...


I was so jazzed. So now these lamps are going to have a new home...On our bedside tables, in the master bedroom! Yeah...Then I went down to OSH this morning, to get some paint stripper...and I saw the prettiest paint in the world It is this opalescent glaze...it comes in a few different shades, like silver, gold, and opal. I was looking at some swatches and samples and found my color. Its called "Winter Sky" by Pratt & Lambert...

Then I'm going to do what Dayka suggested and hot glue some ribbon around the rim of the shade....Oh they are going to be too die for!
So here are their before...


So stay tuned for their Coming out party! Wont take long...since I'm working on the whole "Leave no project unfinished thing!" lol

Monday, March 22, 2010

DIY Pantry Renovation!


The time has come to reveal our new pantry, that use to be our laundry room...ugh I know right...

Step 1 (put up the tracks *notice the water hook-ups for laundry, didn't want to permanently cover, so I made a door with hinges to cover, just in case)

Step 2 (arrange the shelves for the most space*note they go all the way up to the ceiling)

Step 3 ( install counter and storage below)

Step 4 (fill it up)
It has been done for some time now...but Home Depot kinda sucks when it comes to special orders...Hello one month later, and they didn't even call me, I had to call them...ugh

And now after a very impatient waiting period, here it is... I ♥ it, I ♥ them! Super organized, and Super lovely! With everything stored in its own place...I have mucho more counter space... and it gave Hubby the chance to try something too...yep Concrete Countertops...they are still curing, and will be ready to glaze soon, so stick around for that! Freakin Awesome!
Compared to the quote I originally got from Closet World, I think we payed seriously 1/4 of the price. The total for everything to redo our pantry was under $400....Mainly because thanks to Lowes for having a reset sale...only on the stuff we needed...It definitely pays to shop around!
Drum roll please!


Isn't it Awesome! I think so too! just a little bit of touch up painting to do, then 100% done!
We had to order the doors special..because the standard size was something like 1/4 inch too large to fit in the opening...Silly people who re-did the kitchen. I got them to match all the interior doors in the house... like these


Here was one of my inspirations...

The moral of this story is...Don't be lazy, you can do anything you put your mind and heart to...Go out and do it...oooh and save some major money at the same time :)

Chalkboard/Pretty Cool Storage!


Okay I hope your not sick of hearing about Dollar Tree...cuz welp, I like it there, and I wanna share what I found...lol So the problem area of My lil mans robot room, has become a major pain in my butt...I realized, why spend a crap-load of time, making a cool fort, when he probably wont spend any time in there anyways, his toys will still be all over the livingroom, my room, the entryway, the hallway...etc. I must face it, my kid loves to make messes, and not in one spot , in a million spots, and that ok...at least hes smi-entertaining himself right...*pssst, keep telling yourself that*


Problem Area= The closet! ugh. it is huge, and just plain fugly...so I decided to make yet another trip to Dollar Tree, and pick up some bins, to store some (yeah and I mean some) of the 5 billion toys...So I got 6 of these blue and green little bins, and put them on this shelf I have moving from room to room, trying to find a good home for it...and I finally did! Yay me!


Then I masked off a pretty large rectangle, and painted it with chalkboard paint outlined it with these really cool letters, courtesy of Dollar Tree, and I found this little set of 3 green baskets,


I took one and screwedit to the wall to hold all of the chalk and eraser...not a bad solution!


I think I'm done for a bit about Dollar Tree...maybe :)

Sunday, March 21, 2010

The Key to Wall Art


While trying to decide what to do when it comes to artwork in my entryway/mudroom, I was going through all the stuff I have around, and in my stash of art/ frames,I discovered that I already had the perfect frame is the right scale for a wall in my entry way. In the same silvery-gold color as the mirror, I made over here. I acquired an antique lock and key and seperate skeleton key, that I have been wanting to display for awhile now, and now I know where...
Here is the frame, before...


Ehhh nothin a little ORB wouldn't fix...So I took it apart, cleaned and roughed up the frame a bit, and got to painting. Now I needed a nice backdrop for the accessories I was going to put in it, so I ran over to Joanns and picked up some fabric...spray adhered it to a piece of wood, and voila!
Turned out good, hmmm?


Now its time to mount the Lock and Key. I used my trusty hot glue gun...love it!
and its ready to hang...
Here it is complete...
I love how this turned out! frame=free,paint=already had, fabric=$1 and Lock and key =$3 TOTAL=$4
This Entryway project is just about done, Oh and I've just added "complete all projects" to my list of to-dos...lol let see if I follow through.

Super Cute Wall Art

The Dollar Tree...is sometimes my happy place. When I step through the doors, this overwhelming feeling of excitement comes over me...and thoughts, like oooh I could do this, and oooh just a little paint...or oooh if I take this and glue it to this! Its never ending :) I love that place.
So while I was there the other day, I was going through all the little vinyl decal section...princess...nah, cheetah print...nah, frilly chalboard...nah, WHAT ROBOTS! YES! Perfect for my lil mans room...I got 3 sets, and lined the robots up just above the chair rail and beadboard I put up here, and they are too freakin cute...and good final touch for sure! Check em out...


So the next time you are at your local Dollar Tree...Dig around! You'll find it...promise!
Stick around for more finds from the Dollar Tree!

Saturday, March 20, 2010

Make your own Robot


Dun...Dun...Dun...I'm still not completely done with my lil mans Retro Robot Room. I have no idea why I suffer from "un-finished project syndrom"...ugh but its getting old....lol. So just recently I got a wild hair, and wanted to create my very own robot...to sit on the shelf in Brodys room...
I took a trip to Home Depot and grabbed anything that would be used to build a robot...$6.00 later I was done...*pssst I can't believe that springs cost so much* owell... I still wasn't happy with everything I came up with for the body, that was until yesturday when I was at the Dollar Tree, and found this little ceramic television...and ding! a light went on. I'll use it as the body! Woo Hoo! So here it is!
BEFORE

So after I took a sharpie to his face, I scavenged through my pile of parts here... and came up with this...

Not bad huh! I'm super happy with how he turned out!

Speaking of the Dollar store...stick around for my next post, and I'll show what I picked up, to add to my lil mans room :)


Friday, March 19, 2010

The Girl Creative

Friday Follow

Hi! Welcome to Kreative Knack! Feel free to look around! I hope you enjoy!
I♥ Making new friends!

Have a lovely Friday! ...and an even better weekend!


Monday, March 15, 2010

Re-Upholstered Chair


I have added a new addition to my entryway/mudroom. A little spot to call my own. I don't read books, just magazines...so I decided to add a little seating area to our entryway.

I had a certain shaped chair in mind. Comfy but not overstuffed and huge. Wood Detail, but not antique, and frilly. Small but not child like. And I found it for $2 at a little thrift store near my home.

When I saw it, I just knew it was the one...The seat was big enough for my big'ol'bootie...I can even put a leg up and get really comfy. Unfortunately it was upholstered with this dreadful green pleather fabric...So that was the next step, finding the fabric! And I did...it was perfect, at Joanns! I got 2 yards (only used 1 1/2) for $12. and then it was time to actually work.

I ripped off all the old stuff, but kept all the innerds...they were in really good shape. Sprayed it with our power washer, and then painted it "Heirloom White" and re-covered it. Ooooh I also added a few couple layers of batting to the seat part...make it more comfy!
BEFORE
And here ya go about 2 days later it was done!


Very fun!I was really nervous about this project...but it wasn't too bad! And it turned out really good, for my first time...I believe I will do this again!

See me soon...I've got more to come!

Ooooh and I'm linking up here: